Containerised website in Azure
Context
There are multiple ways of containerising applications in Azure. This article focuses on deploying an application to Azure Container Apps (ACA). Focus is on following:
- Creating .NET website (MVC)
- Bulding and testing the image
- Pushing container to registry
- Deploying container to ACA
- Binding website to custom domain
Prerequisites
- Install Docker. Should you struggle to run docker, follow this post installation steps.
- Install VSCode
- Install docker extension in VS Code
- Create Azure Account
Create .NET Web app project
- Create a project folder in your development space
- Execute this command in your project folder
dotnet new mvc –name MVCWebApplication - Open your project folder in VS Code
Add Docker files
- On Mac, open command palette (Shift + Commmand + P) and execute "Docker: Add Docker Files to Workspace" command. This will add Dockerfile and .dockerignore file
- On VS Code terminal, execute
dotnet buildcommand to build the application. Ensure you have 0 Errors, 0 Warnings. - Execute
dotnet publishcommand to make sure that there won't be issues when building the image. - Ensure your docker file has
ENV ASPNETCORE_URLS=http://*:5000:line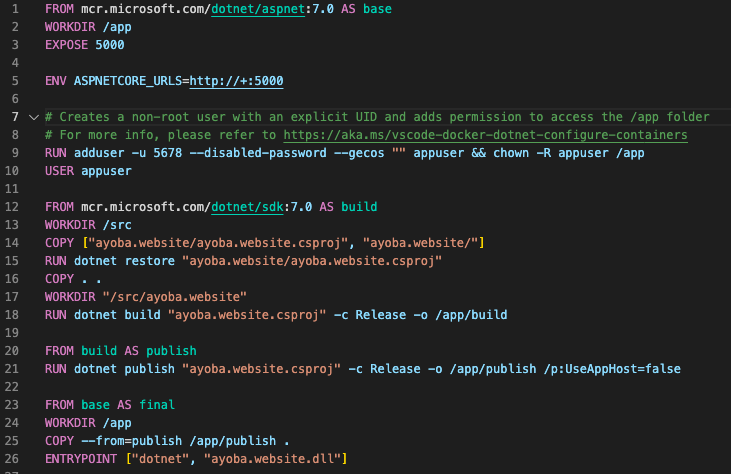
Build & Test Image
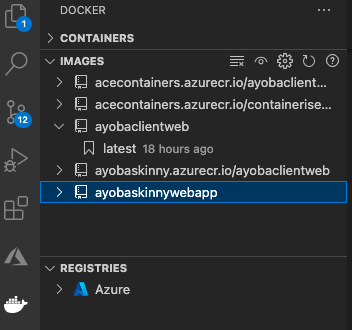
Open command palette (Shift + Commmand + P) and execute "Docker Images: Build Image..." command
Open docker explorer and make sure the image is available
Right click image you want to test and select "Run". In my case it's latest under ayobaclientweb
The green play button should appear in containers section which allow you to test
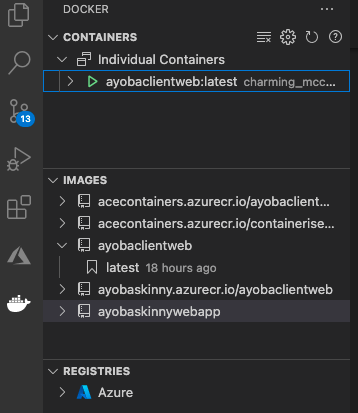
Right click the green icon and select "Open in Browser".
Push image to Azure Container Registries
- On portal.azure.com, search for container registry and create one
- On VS Code, registries section, select "Connect Registry" icon and follow steps to connect to Azure. Once connected, under azure icon you should be able to see registry you created in number 1.

- On images section, right click the and select "push". Follow steps to push to the connected azure registry
Deploy to Azure Container Apps (ACA)
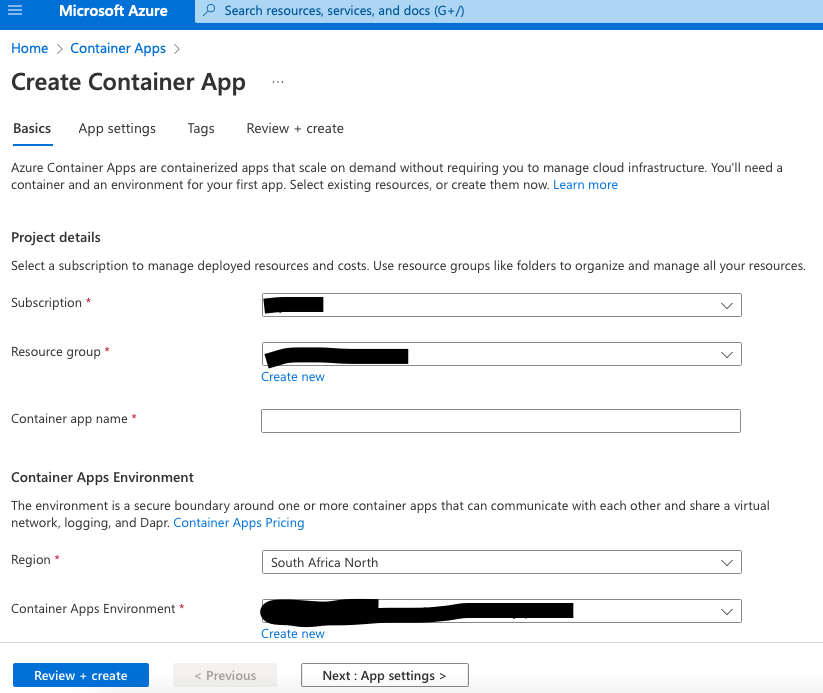
- On portal.azure.com, search for "Container Apps" & create new. Provide required details and click next
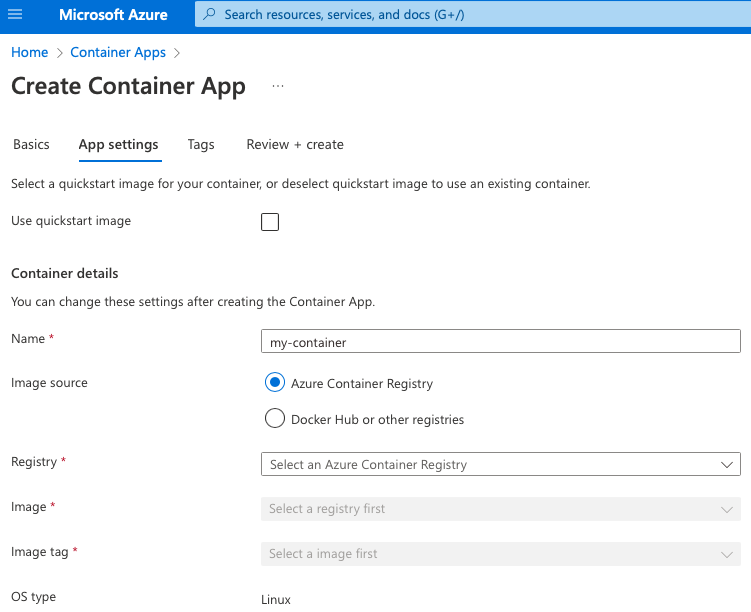
- Unselect "Use quick image" checkbox and select the image you pushed to azure registry
- On the same page, enable ingress and make sure below settings are followed. Click review + create

- Once container app is created, select "Application URL" on overview section to test the web app
Custom Domain
Buy or create certificate
To add a custom domain you will need a certificate. You can either buy the certificate or create a free one via Let's Encrypt. I chose to buy cert from Go Daddy for $40 for a year. Azure supports managed certificate on app services but not on container apps yet.
GoDaddy provides 5 files (including the private key you download before creating the certificate)
If your certificate does not have private key, you'll get below error when you try to upload PEM file from GoDaddy. “Failed to add new private key certificate: [cert name]. Certificate must contain one private key.”
To combine private key and cert, you have to
- Convert your private key text to key using below command
openssl rsa -in key.txt -outform pem -out cert.key - Should you get UTF-8 error when executing above-mentioned command, Open the key file in Notepad++ and verify the encoding. If it says UTF-8-BOM then change it to UTF-8. Save the file and try again. Alternatively you can use vs code to change the encoding using the bottom toolbar! Once converted, execute above-mentioned command again
- Combine cert and key using below command
openssl pkcs12 -inkey cert.key -in cert.pem -export -out output.pem
If you like .pfx file, use below commandopenssl pkcs12 -inkey cert.key -in cert.crt -export -out output.pfx
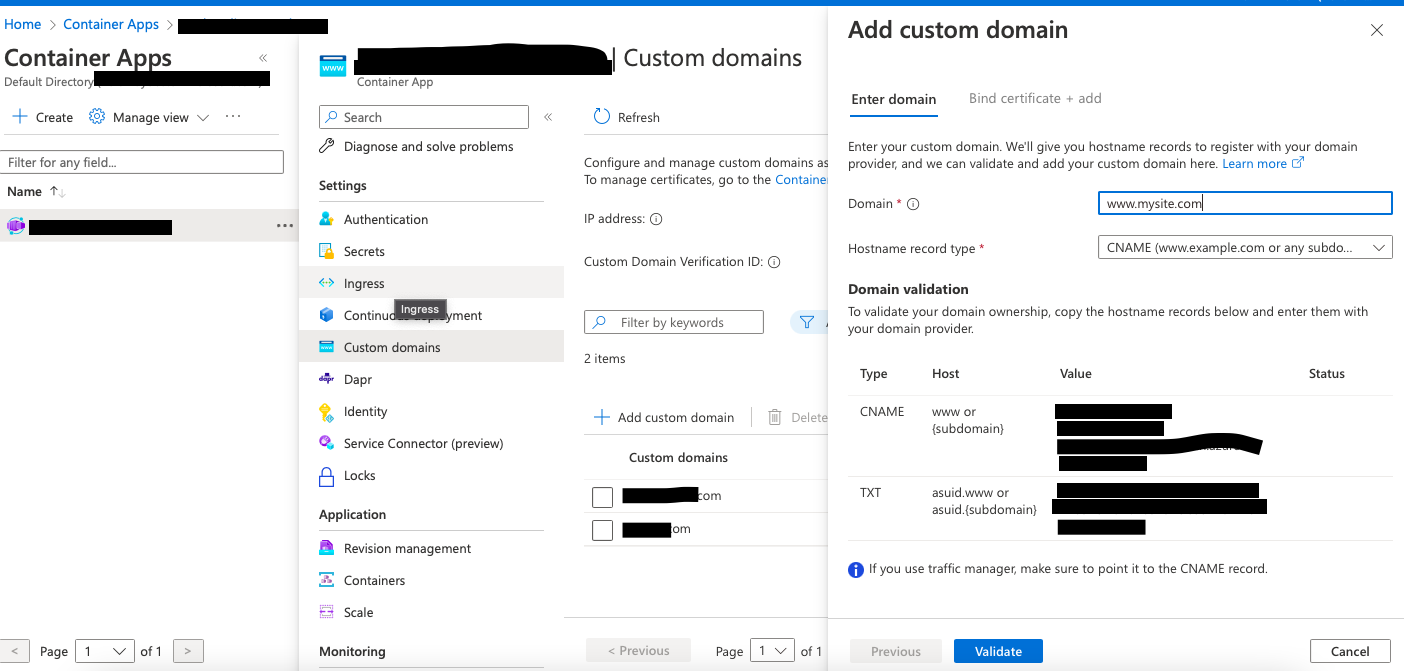
Setup Custom Domain
- Go to your container app
- Select "Custom Domain" on the left menu
- Select "Add Custom Domain"
- Enter domain details, copy CNAME and TXT values and add them to your domain settings with your provider
- Validate and bind the certificate